
BROTHER 1034DX
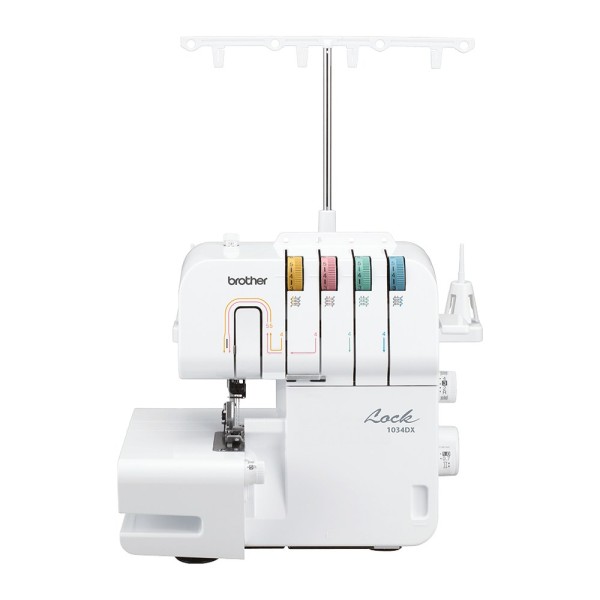

A 3- or 4-thread overlocker with differential feed. It sews the seam, trims the excess fabric and overlocks the raw edge in one step.
The knife trims the excess fabric while the overlock stitch finishes the edge. The knife can be retracted when the edge does not need trimming. Brother lists this model for beginner and intermediate sewers.
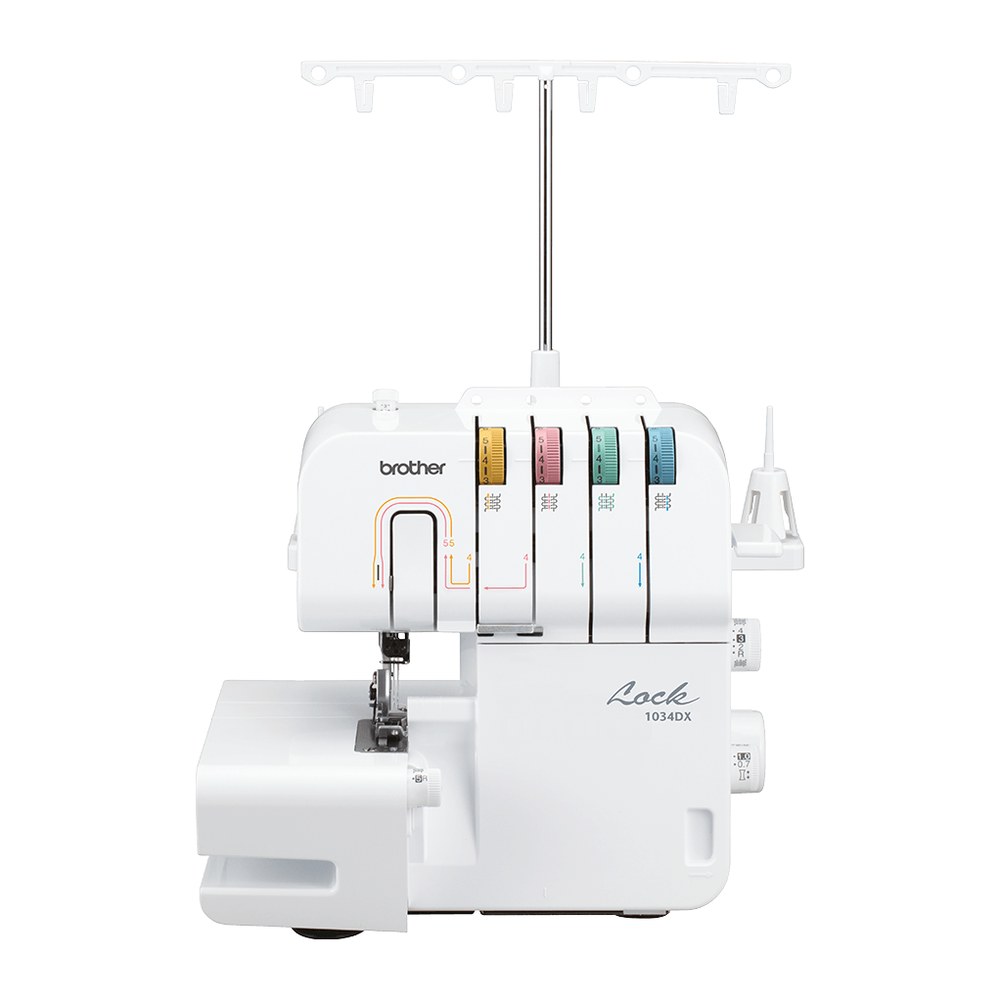
A colour-coded thread path, a telescoping thread guide and a lower looper threading lever make threading easier. With the bed extension removed you get a free arm. The machine is compact, weighs 5.6 kg and has a carry handle.
Features
Colour-coded thread path
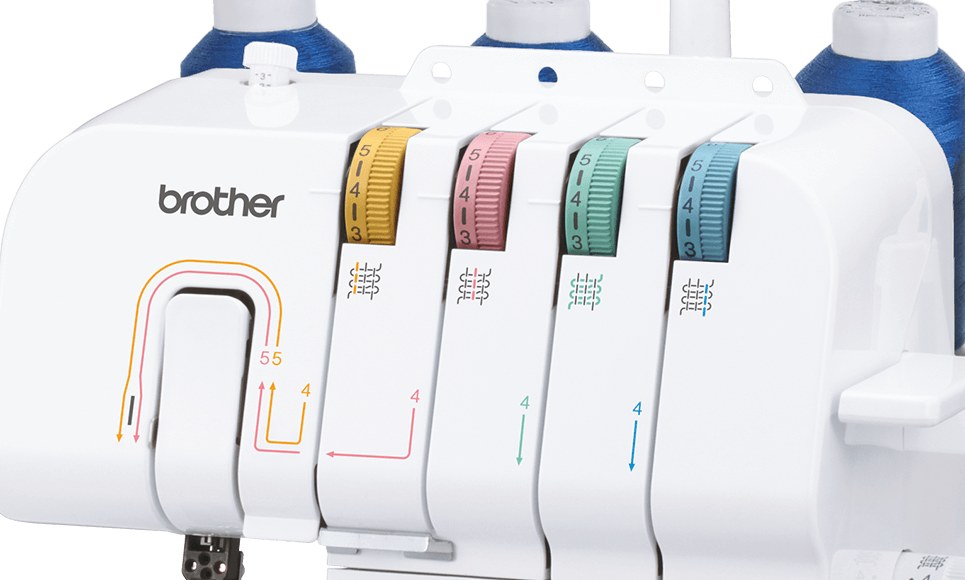
Each thread has its own colour: the yellow marks are for the left needle, pink for the right needle, green for the upper looper and blue for the lower looper. The tension dials use the same colours.
Before threading, pull the telescoping thread guide up to its highest position so that the thread guides on it sit directly above the spool pins. The manual gives the threading order as lower looper, upper looper, right needle, left needle. Both loopers must be threaded before the needles.
Lower looper threading lever
A lever helps you thread the lower looper. With the needle at its highest position, slide the lower looper threading lever to the right, and the looper moves into the position shown in the manual. Pass the thread through the eye of the looper, then turn the handwheel slowly until the lever returns to its original position.
The manual warns that the lever must be moved only in the direction of the arrow: forcing it in another direction may damage it.
Stitch length, width and differential feed
Stitch length is set with a dial on the right side of the body: from 2 to 4 mm, with 3 mm as the normal setting. Stitch width is changed with a separate dial: from 5 to 7 mm, with 5 mm as the normal setting.
There are two sets of feed dogs under the presser foot: the front (differential) set and the rear (main) set. The differential feed changes the ratio of their speeds. The differential feed dial is at the bottom right of the body and changes the ratio from 0.7 to 2.0. The setting 1.0 is normal. With a ratio below 1.0 the front feed dogs move more slowly than the rear ones, so the fabric is stretched as it is sewn and thin fabric does not pucker. With a ratio above 1.0 the front feed dogs move faster, so the fabric is gathered and stretch fabric does not ripple or stretch out. The more elastic the fabric, the further the dial should be turned towards 2.0. Test the setting on a scrap of the same fabric. Do not use the differential feed on non-stretch fabrics such as denim, as Brother warns that the fabric may be damaged.
More features
LED light
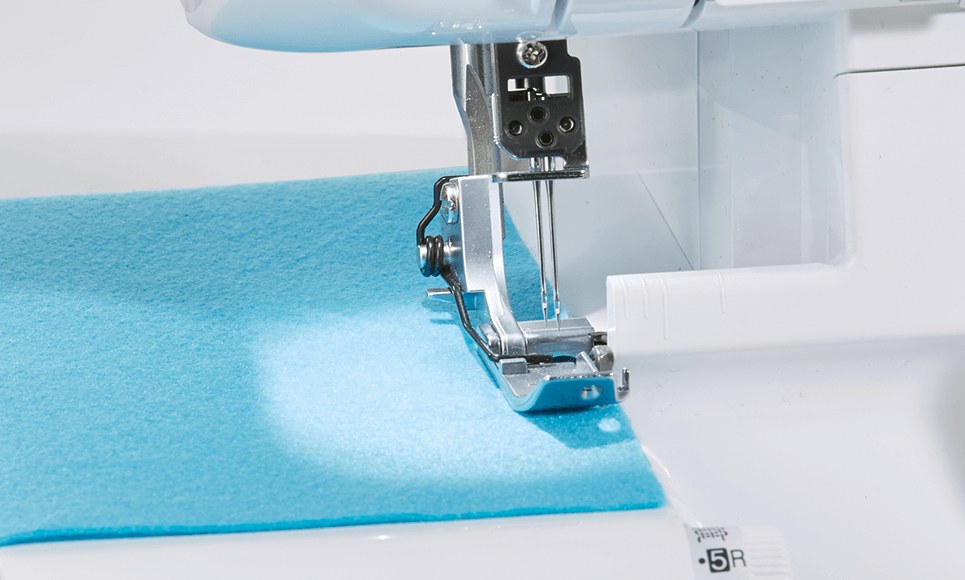
A built-in LED lights up the sewing area.
It is switched on with the same switch as the machine.
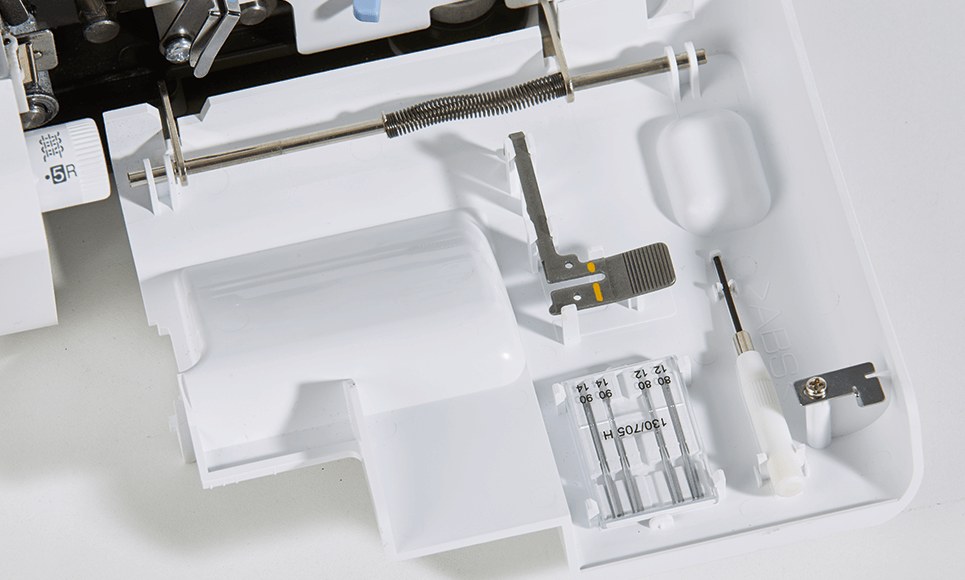
Accessory storage
Behind the front cover there is a compartment for accessories and the removed stitch finger.
In the manual it holds the needle set, the tweezers and the hex driver.
The cover opens by sliding it to the right; it must be closed while the machine runs, and the machine must be switched off before opening it.
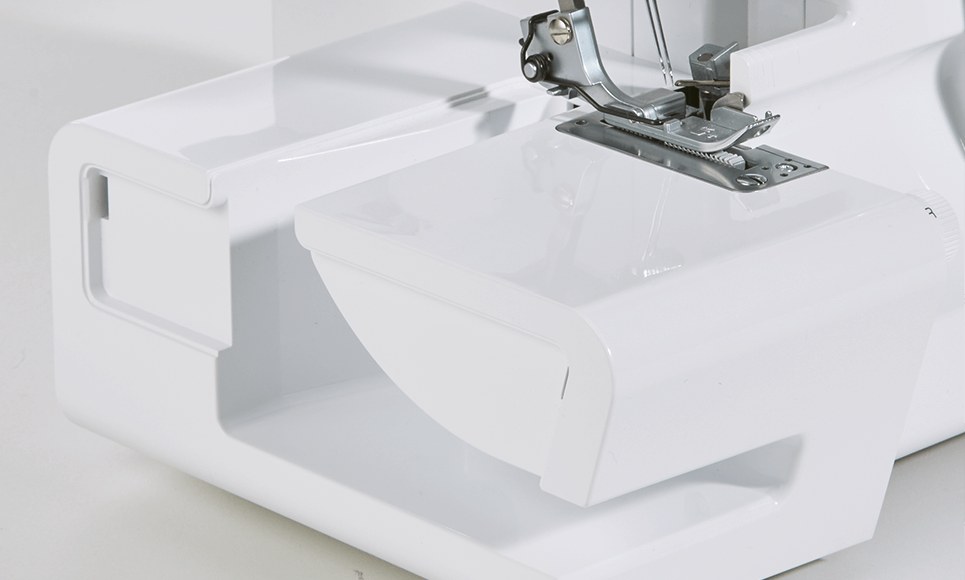
Removable bed extension and free arm
With the bed extension removed you get a free arm, which makes it easier to sew tubular pieces.
The manual advises keeping the removed bed extension in a safe place.
Presser foot pressure adjustment
- A screw on the top left of the machine sets the pressure; the normal setting is “2”.
- When sewing fine fabrics, the pressure can be adjusted so that the fabric does not pucker and curves can be sewn.
- If the fabric does not feed, the manual says to turn the screw clockwise to increase the pressure.
Changeable presser foot
- The standard presser foot is released by pushing the button on the presser foot holder.
- Another foot is placed under the holder and attached by lowering the presser foot lever.
- Turn the machine off or unplug it before changing the foot.
Trim trap
- The optional trap collects the fabric and thread trimmings produced during sewing.
- It can also be used as a foot controller holder; remove the foot controller from the trap when carrying the machine.
Foot controller and speed control
- Pressing the foot controller lightly runs the machine at a low speed.
- The more you press, the faster it sews, and when you release it the machine stops.
- The maximum speed is 1300 stitches per minute, compared with the normal 300 to 800 stitches per minute of an ordinary sewing machine.
Thread chain at the start and end of a seam
- An overlocker leaves a chain of threads at the start and end of a seam.
- According to the manual, when the seam is finished you let the machine run slowly so the chain forms, then cut the threads at about 5 cm.
- The chain can be secured in two ways: sew back over it and trim the rest with the knife, or pull it into the end of the seam with a large-eye hand-sewing needle and fix it with a drop of fabric glue.
Retractable knife
- The knife can be retracted when the edge does not need trimming.
- Move the knife lever only while the needle is at its lowest point, and unplug the power cord from the socket first.
- Do not touch the knife.
- Do not leave pins in the fabric while sewing: the manual warns that they can damage the needles or the knives.
Narrow overlock and rolled hem
- These are decorative or edge-finishing stitches for light to medium-weight fabrics.
- The left needle and the stitch finger are removed, the stitch width dial is set to “R”, and the machine is threaded as a three-thread overlock using the right needle.
- The stitch length dial at “R” gives the rolled hem, and settings from “R” to 2 give the narrow overlock stitch.
- The stitch finger must be put back when sewing regular overlock stitches.
Blind stitch foot
- The optional blind stitch foot lets you sew a blind hem stitch and overlock the edge at the same time.
- The manual notes that this suits cuffs, trouser turn-ups, pockets and skirt hems.
- The guide on the foot also helps with the flat lock, pin tuck and other decorative stitches.
Spool caps, spool nets and decorative thread
- When using sewing thread spools, fit the spool cap with the notch of the spool at the bottom.
- If you sew with loosely spun nylon thread, the manual recommends covering the spool with the supplied net so that the thread does not slip off.
- The box includes 4 nets and 4 caps.
- The manual suggests using decorative thread in the upper looper.
Maintenance
- According to the manual, oil the machine before first use and, in normal use, once or twice a month (once a week with heavier use) after removing lint; clean dust with the included brush.
Motor and ventilation openings
- During continuous running the motor block warms up, but the manual says this does not affect performance.
- The ventilation openings on the side and rear of the machine must not be covered with paper or fabric, and lint, dust, fabric and thread ends must be cleaned off the vents and the foot controller regularly.
- While the motor runs, sparks may be visible through the vents in the motor block; the manual says they come from the carbon brushes and the commutator and are completely normal.
Changing needles
- Needles are changed with the included hex driver.
- First switch the machine off and turn the handwheel until the mark on it is aligned with the line on the machine.
- Then loosen the set screw of the corresponding needle and remove the needle.
- Hold the new needle with its flat side away from you, insert it as far as it will go and tighten the screw securely.
- If the needles are inserted correctly, the right needle sits slightly lower than the left one.
Handwheel
- The handwheel turns counterclockwise, the same direction as on an ordinary home sewing machine.
- The needles reach their highest position when the mark on the handwheel is aligned with the line on the machine.
Stitches
The manual describes eight stitches: five standard ones and three that need the optional blind stitch foot. The blind hem and the 3-thread flat lock are sewn with the blind stitch foot and the left needle, with the right needle removed. The 3-thread flat lock is not suitable for thin fabrics.
- 4-thread overlock stitch – a strong seam, suitable for knitted fabrics
- 3-thread wide overlock stitch, 5 mm (left needle, right needle removed) – suitable for medium to heavy materials
- 3-thread narrow overlock stitch, 2.8 mm (right needle, left needle removed) – suitable for fine to medium materials
- Narrow overlock stitch, 2.0 mm – a decorative or edge-finishing stitch
- Rolled hem, 2.0 mm – a decorative or edge-finishing stitch
- Blind hem (with the optional blind stitch foot)
- 3-thread flat lock (with the optional blind stitch foot)
- Pin tuck (with the optional blind stitch foot)
Stitch settings from the manual
| Stitch | Threads and needles | Stitch width | Stitch length |
|---|---|---|---|
| 4-thread overlock stitch | 4 threads, left and right needles | 5–7 mm | 2–4 mm |
| 3-thread wide overlock stitch | 3 threads, left needle (right needle removed) | 5 mm | 2–4 mm |
| 3-thread narrow overlock stitch | 3 threads, right needle (left needle removed) | 2.8 mm | 2–4 mm |
| Narrow overlock stitch | 3 threads, right needle; left needle and stitch finger removed | 2.0 mm (“R”) | “R” to 2 mm |
| Rolled hem | 3 threads, right needle; left needle and stitch finger removed | 2.0 mm (“R”) | “R” |
| Blind hem | 3 threads, left needle (right needle removed), blind stitch foot | 5 mm | 3–4 mm |
| 3-thread flat lock | 3 threads, left needle (right needle removed), blind stitch foot; not suitable for thin fabrics | 5 mm | 2–4 mm |
| Pin tuck | As for the narrow overlock stitch, with the blind stitch foot | “R” | “R” to 2 mm |
Fabrics, threads and needles
| Fabric | Stitch | Stitch length, mm | Thread | Needle |
|---|---|---|---|---|
| Fine (e.g. georgette, batiste, organza, tricot) | Overlock stitch | 2.0–3.0 | Spun No. 80–90, cotton No. 100 or “Tetron” No. 80–100 | 130/705H No. 80 |
| Fine (same fabrics) | Narrow overlock and rolled hem | R–2.0 | Needle thread: spun No. 80–90 or “Tetron” No. 80–100. Looper thread: woolly nylon, spun No. 80–90 or “Tetron” No. 80–100 | 130/705H No. 80 |
| Medium (e.g. mercerised cotton, gabardine, serge) | Overlock stitch | 2.5–3.5 | Spun No. 60–80, cotton No. 60–80 or “Tetron” No. 60–80 | 130/705H No. 80 or No. 90 |
| Medium (mercerised cotton) | Narrow overlock and rolled hem | R–2.0 | Needle thread: spun No. 60–80 or “Tetron” No. 60–80. Looper thread: woolly nylon, spun No. 60–80 or “Tetron” No. 60–80 | 130/705H No. 80 or No. 90 |
| Heavy (e.g. tweed, denim, knitted fabrics) | Overlock stitch | 3.0–4.0 | Cotton No. 50–60, spun No. 60 or “Tetron” No. 50–60 | 130/705H No. 90 |
Videos
These videos were published by another author (Sow and Sew), not by Brother.
Technical specifications
| Fabrics | From light to heavy |
|---|---|
| Maximum sewing speed | 1300 stitches/min |
| Stitch width | 5–7 mm (dial range); 2.3–7 mm in the manual's table |
| Stitch length | 2–4 mm, the normal setting is 3 mm; for the narrow overlock stitch from “R” to 2.0 mm, for the rolled hem “R” |
| Differential feed ratio | 0.7–2.0, the normal setting is 1.0 |
| Needle bar stroke | 25 mm |
| Presser foot lift | 5–6 mm |
| Presser foot | Standard snap-on foot |
| Presser foot pressure | Adjustable, the normal setting is “2” |
| Knife drive | Driven from below |
| Thread tension | Four colour-marked dials: yellow for the left needle, pink for the right needle, green for the upper looper and blue for the lower looper. Most sewing is done at “4” (standard thread: SPAN 60/3Z). For heavy tension use 4 to 7, for light tension 4 to 2 and for medium tension 5 to 3. |
| Fabric guide scale | 9.5, 12.7, 15.9 and 25.4 mm when the stitch width dial is set to “5” |
| Needles | 130/705H, a standard home sewing machine needle; No. 80 or No. 90 is recommended. To reduce fabric damage, the manual suggests a 130/705H SUK No. 90 ball point needle. When the needles are fitted correctly, the right needle sits slightly lower than the left. |
| Threads and needles | 3 or 4 threads (convertible); one or two needles |
| Weight | 5.6 kg |
| Dimensions (W × D × H) | 33.5 × 28.2 × 29.6 cm |
| Country of origin | Taiwan |
| Intended use | Household use (according to the Brother manual) |
| Warranty | 3 years (1 year for commercial use, according to Brother) |
In the box
In the box, according to the Brother manufacturer's page and operation manual.
- Soft cover
- Accessory bag
- Tweezers
- Spool nets (4 pcs)
- Thread spool caps (4 pcs)
- Cleaning brush
- Hex driver
- Needle set 130/705H (No. 80 – 2 pcs, No. 90 – 2 pcs)
- Foot controller (with power cord)
- Instruction DVD
- Instruction manual
Optional accessories (not included in the box)
List compiled from the Brother operation manual and the Brother support page section 'Consumables & Options' for this model.
- Wide table SERGERWT2 – for better fabric handling during sewing
- Blind stitch foot SA214 – lets you sew a blind stitch, trim the excess fabric and overlock the edge at the same time
- Gathering foot SA213 – designed for gathering and sewing in one operation
- Pearls and sequins foot SA211 – lets you sew a sequence of pearls onto fabric; the manual calls it the “Pearl sequence foot” and gives pearl sequences of 3–5 mm, while the Brother support page gives pearls and sequins up to 5 mm in diameter; the manual mentions decorating the edges of curtains, tablecloths and dresses
- Piping foot SA210 – lets you sew piping into the edge of the fabric; the manual mentions decorating the edges of pyjamas and sportswear, furniture covers, cushions and bags
- Tape and elastic foot SA212 – lets you attach elastic or tape in one step; the manual gives a tape or elastic width of 6–12 mm
- Trim trap – listed as an optional accessory in the manual; it holds the trimmed fabric and thread and can also be used as a foot controller holder
Manuals
Any questions?
Call +370 685 85915 or email info@siuvimomanija.lt. We will help you check whether this overlocker is right for your work.