
BROTHER RL425
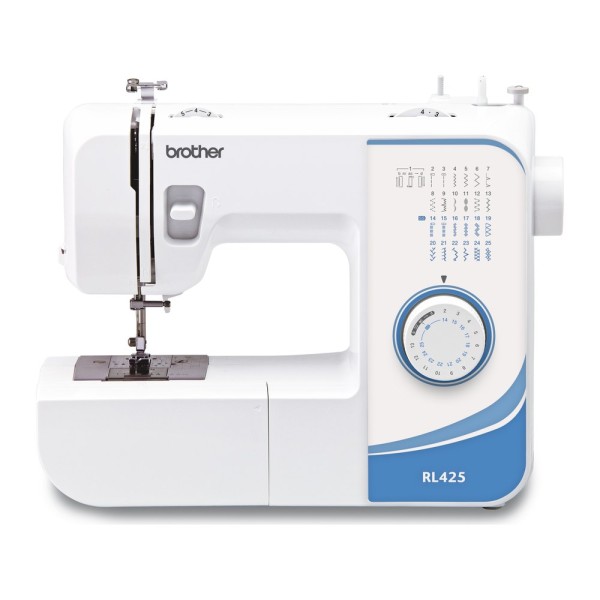

A mechanical sewing machine with 25 stitches, an automatic 4-step buttonhole and a separate stitch length dial. You choose the stitch with a single dial, and the bobbin is loaded from the top.
The Brother RL425 is made for everyday sewing: mending clothes, sewing buttonholes, inserting zips, hemming, appliqué and patchwork. According to the Brother manual, the machine is intended for household use.
Carry the machine only by its handle: lifting it by any other part may damage it or make it fall.
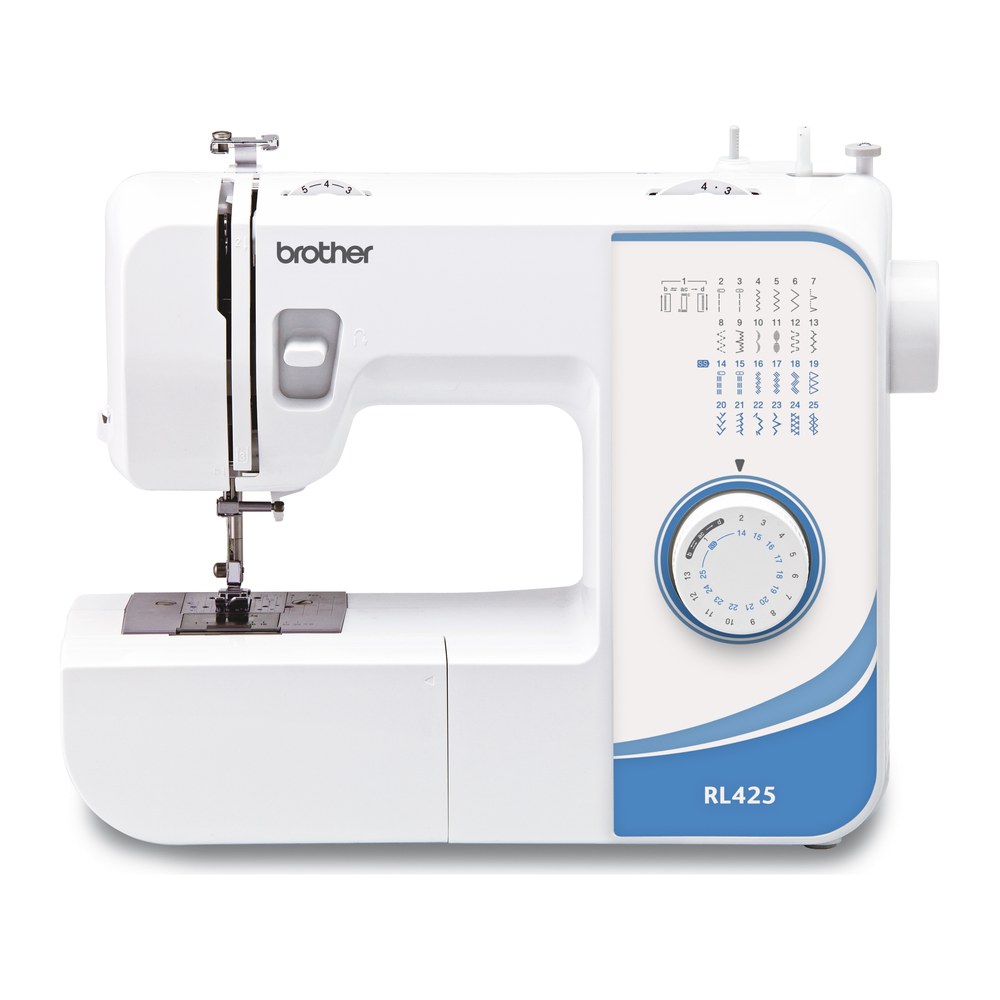
Features
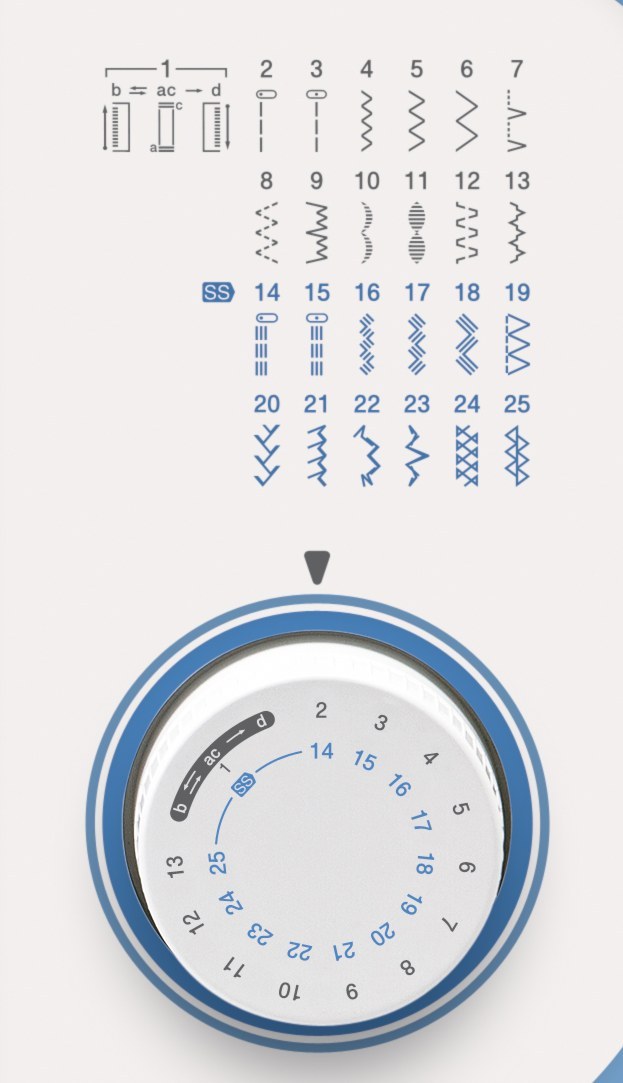
25 stitches from one dial
You choose a stitch by turning a single dial. There are 25 stitches including a buttonhole: straight stitches, zigzags, stretch stitches, stitches for joining fabric and finishing edges, and decorative stitches.
The width of each stitch is preset, and you adjust its length with a separate stitch length dial. You will find the width and the recommended length in the table below.
Turn the stitch selection dial only when the needle is raised: turn the handwheel towards you until the mark on it is at the top. If you turn the dial while the needle is down, the needle, presser foot or fabric may be damaged.
Stitch length dial and stretch stitches
The numbers on the stitch length dial are the stitch length in millimetres: the higher the number, the longer the stitch. At the “0” setting the fabric is not fed.
The “F”–“1” range is for a dense zigzag (satin stitch), which is used for buttonholes and decorative stitches. The exact position depends on the fabric and thread, so test it on a scrap of fabric.
When you set the stitch length dial to “SS”, the selected stitch becomes a stretch stitch. In the table the stretch stitches no. 14–25 are marked “SS”, and their length is fixed at 2.5 mm.
If the stitches bunch together, increase the stitch length. Do not keep sewing without increasing the length: the needle may break and cause injury.
Automatic 4-step buttonhole
A buttonhole is sewn in four steps: front bar tack, left side, back bar tack and right side. For the first step you set the dial to position “a”, for the second to “b”, for the third to “c” (the same position as “a”) and for the fourth to “d”. The front and back bar tacks are 5 to 6 stitches each. You sew with buttonhole foot “A” and set the stitch length in the “F”–“1.5” range (width: 5 mm). After attaching the foot, push its frame back as far as it will go.
Try the buttonhole on a scrap of fabric before sewing it on a garment. When sewing soft fabrics, it is recommended to place a stabiliser under the fabric.
To secure the stitching, turn the fabric 90 degrees anticlockwise and sew straight stitches to the end of the front bar tack. Before cutting, it is recommended to put pins across both ends of the buttonhole so that you do not cut the stitches; cut the opening in the middle with a seam ripper.
If the two sides of the buttonhole are sewn unevenly, first use the stitch length dial (in the “F”–“1.5” range) to adjust the stitch density of the right side on a scrap of fabric. Then, if the left side is too sparse compared with the right side, turn the buttonhole fine-adjustment screw in the “–” direction; if it is too dense, turn it in the “+” direction.
Top-loading bobbin
The lower-thread bobbin is loaded from the top, after you slide off and remove the bobbin cover.
Use only the bobbin supplied with the machine or bobbins of the same type: height 11.5 mm (SFB: XA5539-151). According to the manual, if you use bobbins from other models the machine will not work properly, and using other bobbins may damage the machine.
Free arm and accessory compartment
Slide the flat bed attachment to the left and remove it to get a free arm. It makes it easier to sew cuffs, trouser legs and other hard-to-reach areas: slide the part you want to sew onto the arm and sew from the top. If the item is too small to slide onto the arm, or too short, the fabric will not feed properly and you may not get the result you want.
You can keep accessories in the compartment inside the removable flat bed attachment. When you have finished free-arm sewing, put the flat bed attachment back in its original position.
More features
Reverse sewing
- To secure the start or end of a seam, push the reverse sewing lever in as far as it goes and hold it while you lightly press the foot controller.
- When you release the lever, the machine sews forward again.
- The reverse stitch length is fixed at 2 mm.
Foot controller and sewing speed
- You control the sewing speed and start and stop sewing with the foot controller: pressed lightly, the machine runs at a low speed; the harder you press, the faster it sews; when you take your foot off, the machine stops.
- Do not switch the machine on while pressing the foot controller: it may start unexpectedly.
Thread tension
- You adjust the upper thread tension with a dial.
- If loops appear on the surface of the fabric, the tension is too tight: turn the dial to a lower number.
- If loops appear on the back of the fabric, the tension is too loose: turn the dial to a higher number.
Bobbin winding and thread cutter
- You can wind the lower-thread bobbin on the machine itself.
- You can cut the threads with the cutter built into the machine: pass the threads through the cutter.
LED light
- An LED lamp lights the sewing area.
- One switch turns on both the machine and the lamp.
Changing the presser foot
- You remove the presser foot by pressing the black button at the back of the presser foot holder.
- You attach another foot and fix it by lowering the presser foot lever.
- Change the presser foot only when the machine is switched off, and always use the correct foot for the chosen stitch.
Sewing thick and thin fabrics
- If thick fabric does not fit under the presser foot, raise the presser foot lever even higher.
- If you sew fabric more than 6 mm thick or push the fabric with too much force, the needle may bend or break.
- When sewing thin fabrics, the stitching may become misaligned or the fabric may not feed correctly: in that case place thin paper or stabiliser under the fabric, sew them together and tear off the excess when you have finished.
Stretch fabrics and the ball point needle
- Baste stretch fabrics first and sew them without stretching the fabric.
- Use a ball point needle for stretch fabrics and for fabrics where skipped stitches occur easily: the factory-recommended needle is the HG-4BR (Organ), and a Schmetz “JERSEY BALL POINT” 130/705H SUK 90/14 may be used as a substitute.
Twin needle (optional accessory)
- The 2.0/75 twin needle (X57521-021, 2 mm width) and the extra spool pin XE2241-001 are available separately.
- Use only the twin needle made for this machine, together with zigzag foot “J”.
- According to the manual, use the twin needle only with the straight stitch (centre needle position) no. 3, the zigzag stitch with a 1.5 mm width (no. 4), the triple stretch stitch (centre needle position) no. 15 and the triple zigzag stretch stitch with a 1.5 mm width (no. 16); do not use it with any other stitches.
- Thread each needle separately by hand, from front to back.
- After selecting a stitch, slowly turn the handwheel towards you and check that the needle does not touch the presser foot.
- If the stitches bunch together, increase the stitch length.
Air vent
- Do not cover the air vent while the machine is in use.
- Connect the machine only to regular household mains electricity.
Maintenance
- The user must not oil the machine: it was lubricated at the factory with the right amount of oil, so periodic oiling is not needed.
- Unplug the machine before cleaning.
Stitches
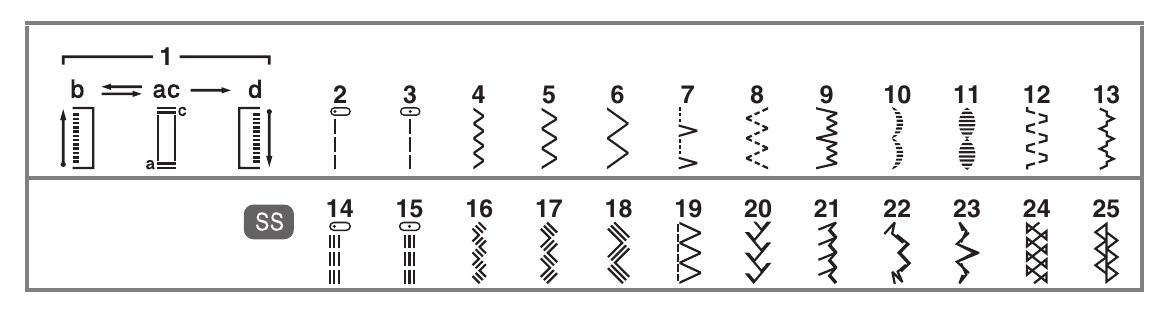
Stitch length and width
| No. | Stitch | Recommended length, mm | Width, mm |
|---|---|---|---|
| 1 | Automatic 4-step buttonhole | F–1.5 | 5 |
| 2 | Straight stitch (left needle position) | 1–4 | – |
| 3 | Straight stitch (centre needle position) | 1–4 | – |
| 4 | Zigzag | F–4 | 1.5 |
| 5 | Zigzag | F–4 | 3.5 |
| 6 | Zigzag | F–4 | 5 |
| 7 | Shell tuck stitch | F–3 | 5 |
| 8 | Elastic stitch | F–2.5 | 5 |
| 9 | Stretch blind hem stitch | F–1.5 | 3 |
| 10 | Scallop stitch | F–1.5 | 5 |
| 11 | Bead stitch | F–1.5 | 5 |
| 12 | Double action stitch | F–3 | 5 |
| 13 | Bridging stitch | F–3 | 5 |
| 14 | Triple stretch stitch (left needle position) | SS (fixed 2.5) | – |
| 15 | Triple stretch stitch (centre needle position) | SS (fixed 2.5) | – |
| 16 | Triple zigzag stretch stitch | SS (fixed 2.5) | 1.5 |
| 17 | Triple zigzag stretch stitch | SS (fixed 2.5) | 3.5 |
| 18 | Triple zigzag stretch stitch | SS (fixed 2.5) | 5 |
| 19 | Elastic overlock stitch | SS (fixed 2.5) | 5 |
| 20 | Feather stitch | SS (fixed 2.5) | 5 |
| 21 | Comb stitch | SS (fixed 2.5) | 5 |
| 22 | Decorative stitch | SS (fixed 2.5) | 5 |
| 23 | Decorative stitch | SS (fixed 2.5) | 5 |
| 24 | Fagoting stitch | SS (fixed 2.5) | 5 |
| 25 | Decorative stitch | SS (fixed 2.5) | 5 |
Fabrics, threads and needles
| Fabric or use | Thread | Needle |
|---|---|---|
| Medium-weight fabrics (taffeta, flannel, gabardine) | Cotton and synthetic: No. 60–90. Silk: No. 50 | 75/11–90/14 |
| Thin fabrics (georgette, satin) | Cotton and synthetic: No. 60–90. Silk: No. 50 | 65/9–75/11 |
| Thick fabrics (denim, corduroy, tweed) | Cotton: No. 30 | 100/16 |
| Thick fabrics (denim, corduroy, tweed) | Cotton: No. 50. Synthetic and silk: No. 50–60 | 90/14–100/16 |
| Stretch fabrics (jersey, tricot) | Thread for knits: No. 50–60 | 75/11–90/14, ball point needle (gold-coloured) |
| Fabrics that fray easily | Cotton and synthetic: No. 50–90. Silk: No. 50 | 65/9–90/14 |
| Topstitching | Synthetic and silk: No. 30 | 100/16 |
| Topstitching | Synthetic and silk: No. 50–60 | 75/11–90/14 |
| Any fabric | Transparent nylon thread | 90/14–100/16 |
What you can sew
Based on the Brother user manual.
- Plain seams: straight stitches no. 2 and 3. It is recommended to sew a straight reinforcing stitch at the beginning and end of zigzag stitching
- Topstitching and lightweight fabrics: straight stitches; for stretch fabrics – triple stretch stitches no. 14 and 15
- Zigzag: stitches no. 4–6 (width 1.5, 3.5 or 5 mm); with the length set in the “F”–“1” range you get a dense zigzag (satin) stitch for buttonholes and decorative stitches
- Zip insertion: zip foot “I”, straight stitch no. 3, length 2–3 mm
- Sewing on buttons: button sewing foot “M” and darning plate, zigzag stitches no. 4, 5 or 6 (choose the width according to the distance between the holes in the button)
- Gathering: straight stitches no. 2 or 3, length 4 mm; loosen the upper thread tension, sew one or more rows and pull the lower threads
- Darning: darning plate, straight stitches no. 2 or 3
- Appliqués: zigzag stitches no. 4–6, length “F”–2
- Hems: stretch blind hem stitch no. 9; hems of skirts and trousers are easier to sew with the flat bed attachment removed (free arm)
- Mending, sewing on elastic and joining fabric: elastic stitch no. 8 (also suitable for knitted fabrics; with nylon thread the stitch is not visible)
- Edges of lightweight fabrics: the shell tuck stitch no. 7 makes a picot (lace-like) edge; set the thread tension tighter than normal
- Joining pieces of fabric, for example for patchwork: double action stitch no. 12 and bridging stitch no. 13
- Joining pieces of fabric with a gap between their edges (fagoting): stitches no. 24 and 25; the stitch looks more decorative with thicker thread
- Joining seams and finishing the edge in one operation (overedge stitching): elastic overlock stitch no. 19 (for stretch fabrics) and comb stitch no. 21
- Sewing heavyweight stretch fabrics: triple zigzag stretch stitches no. 16–18 can be used wherever a zigzag stitch would be used; they can also be used as a decorative topstitch
- Decorative finishing: feather stitch no. 20 (for example for embroidering and for hems of blankets, tablecloths or curtains), scallop stitch no. 10, bead stitch no. 11 and decorative stitches no. 22 and 23
Video
Official video about this model from Brother SewingCraft Europe.
Technical specifications
| Number of stitches | 25, including a buttonhole |
|---|---|
| Buttonhole | Automatic, 4-step |
| Construction | Mechanical, stitch selected with a dial |
| Stitch length | Adjustable with a dial |
| Recommended stitch length | Adjustable with a separate dial: from “F” to 4 mm (see the table); for the stretch stitches no. 14–25 (“SS” setting) the length is fixed at 2.5 mm |
| Reverse stitch length | Fixed at 2 mm |
| Stitch width | Preset for each stitch: 1.5 to 5 mm (see the table) |
| Bobbin | Top-loading |
| Bobbin type | Height 11.5 mm (SFB: XA5539-151) |
| Bobbin case | Brother code XE9326-001 |
| Needles | Only needles for home sewing machines, from 65/9 to 100/16 (see the table “Fabrics, threads and needles”). Follow the combinations in the table: a wrong combination may bend or break the needle, and the seam may be uneven, the fabric may pucker or stitches may be skipped |
| Recommended threads | No. 30–90 (according to the manual's table), silk No. 30–60; thread of No. 20 or lower (heavier thread) must not be used |
| Twin needle (optional accessory) | Only 2.0/75 (X57521-021), with zigzag foot “J”; stitches no. 3, 4, 15 and 16 |
| Free arm | Yes |
| Accessory compartment | Yes, in the removable flat bed attachment |
| Lighting | LED |
| Bobbin winder | Yes |
| Thread cutter | Yes |
| Foot controller | KD-2902 (according to the manual, for 220–240 V areas) |
| Country of origin | Vietnam |
| Intended use | Household use (according to the Brother manual) |
| Warranty | 3 years |
In the box
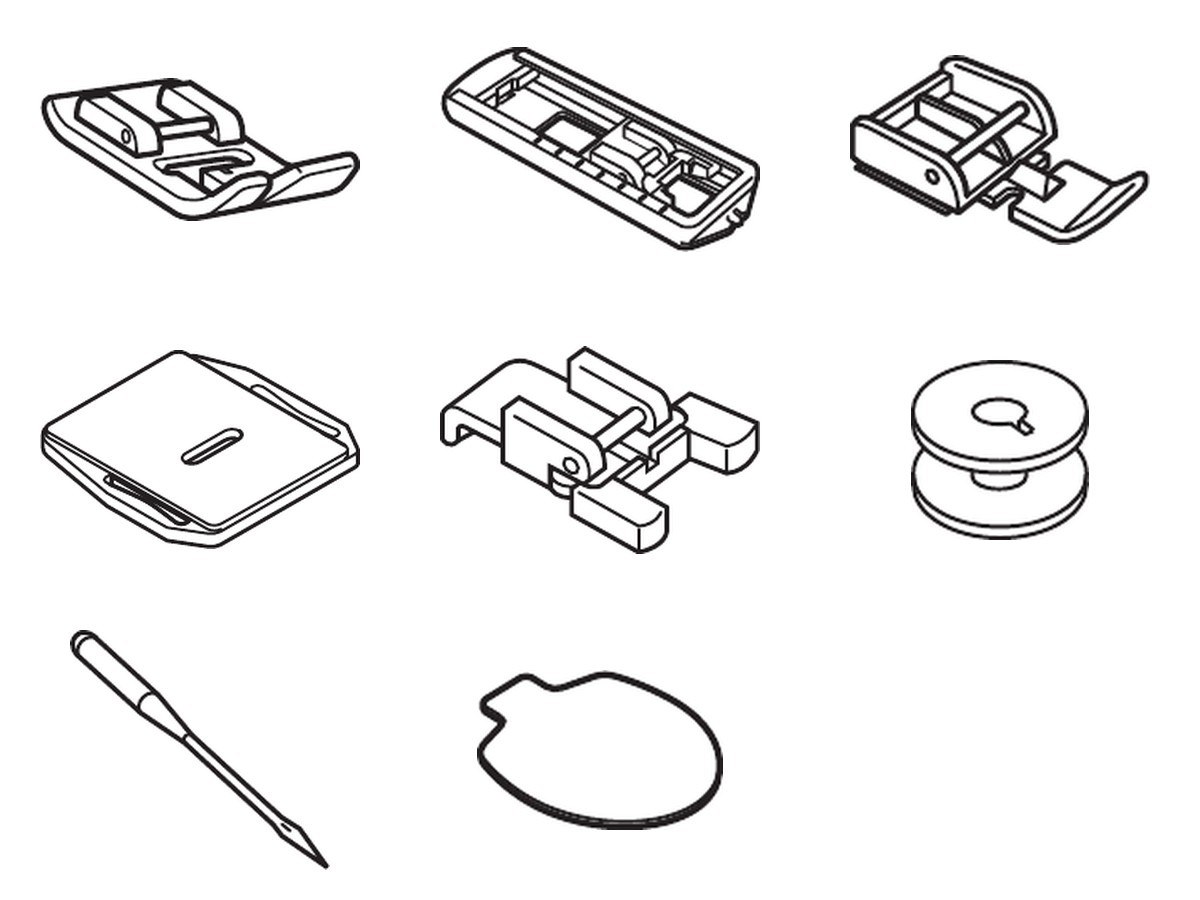
In the box according to the Brother operation manual; the manual notes that the included accessories may vary by model.
- Zigzag foot “J” (fitted to the machine)
- Buttonhole foot “A”
- Zip foot “I”
- Darning plate
- Button sewing foot “M”
- Bobbin (one is in the machine)
- Needle set (90/14 needles): 3 or 2 needles, depending on the set
- Screwdriver
- Foot controller (with power cord)
Optional accessories
Depending on the set, some of these accessories may already be in the box. List compiled from the Brother operation manual and the Brother support page section 'Consumables & Options' for this model.
- Bobbins, 10 pcs (SFB)
- Bobbins and bobbin clips (BCL)
- Wide table WT9
- Patchwork kit FP03
- Twin needle (2.0/75) X57521-021
- Extra spool pin XE2241-001
- Adjustable zipper/piping foot F036N
- Blind stitch foot F018N
- Concealed zipper foot F004N
- Edge joining foot F056
- Narrow hemmer foot F003N
- Non-stick foot F007N
- Overlock foot F015N
- Picot foot F029N
- Stitch guide foot F035N
- Straight stitch foot F011N
- Vertical stitching alignment foot F063
- Concealed zipper foot F080 (no need to press the zip edges before sewing)
- Binding foot F014N
- Braiding foot F021N
- Clear-view foot F023N
- Cording foot F024N
- Fringe foot F025N
- Gathering foot F012N
- Open toe foot (metal) F060
- Open toe foot F027N
- 1/4-inch patchwork foot F001N
- 1/4-inch patchwork foot with guide F057
- Quilting guide F016N
- Open toe quilting foot F061
- Quilting foot F005N
- Walking foot F034N
- Free motion guide grip FMG2
Manuals
Any questions?
Call +370 685 85915 or email info@siuvimomanija.lt. We will help you check whether this sewing machine is right for your work.